
Posted by Edd Mann on Jul 27, 2018
Mince Pie Challenge: Adding the Bootstrap Endpoint and Serverless Offline
Up until now, we have spent our time setting up the API project to provide a confident testing pipeline (with types) and Amazon Cognito authentication.
We will now move on to implementing the first real API endpoint, that being the Bootstrap response.
Along the way we will configure Serverless Offline, allowing us to locally interact with the API, without having to provision any online resources.
Adding the Bootstrap Endpoint
If we look back at the RAML API definition, we can see that this endpoint is used to help aid the client in discovering all the different endpoints/actions that are available to them.
We also provide the base endpoint and some Amazon Cognito User Pool specific information.
To start with, we will replace the user authentication handler examples present within functions.yml with our Bootstrap handler.
bootstrap:
  handler: src/bootstrap.handler
  environment:
    USER_POOL_CLIENT_ID: ${file(./config.${self:provider.stage}.yml):userPoolClientId}
    BASE_ENDPOINT_URL: ${file(./config.${self:provider.stage}.yml):baseEndpointUrl}
  events:
    - http:
        path: /
        method: get
        cors: true
In this case we are explicitly supplying several additional environment variables to this particular handler.
As these are only required within this endpoint, following the principle of least privilege states that they should only be supplied within here.
We are fetching these values from the stage specific configuration file (config.dev.yml), referencing the User Pool Client resource in a similar manor to how we reference the User Pool in the previous post.
We also enable CORS support within the API Gateway endpoint, as the API will be hosted on a different sub-domain to the client.
# ..
baseEndpointUrl: 'https://dev.api.mincepiechallenge.com'
userPoolClientId:
  Ref: PieUserPoolClient
With this endpoint now defined, we can move on to implementing the behaviour.
We will first add a new dependency to the package.json, this provides a nice abstraction around managing HAL resources.
{
  "dependencies": {
    "hal": "^1.2.0"
  }
}
From here, we can implement the delivery specific handler within src/bootstrap.js.
// @flow

import bootstrap from './handlers/bootstrap';

const { USER_POOL_ID, USER_POOL_CLIENT_ID, BASE_ENDPOINT_URL } = process.env;

if (!USER_POOL_ID) {
  throw new Error('USER_POOL_ID is not present');
}

if (!USER_POOL_CLIENT_ID) {
  throw new Error('USER_POOL_CLIENT_ID is not present');
}

if (!BASE_ENDPOINT_URL) {
  throw new Error('BASE_ENDPOINT_URL is not present');
}

export const handler = bootstrap({
  getPoolId: () => USER_POOL_ID,
  getClientId: () => USER_POOL_CLIENT_ID,
  getBaseEndpointUrl: () => BASE_ENDPOINT_URL,
});
This file exports the concrete handler that is called when the API Gateway endpoint is triggered. We pull together all the externally required dependencies, in this case environment variables. We ensure these environment variables are present and then encapsulate them into small services that the underlying handler will use.
This allows us to now create the underlying handler implementation within src/handlers/bootstrap.js.
// @flow

import { createHandler } from '../helpers/handlers';
import { ok } from '../helpers/http';
import { Resource } from 'hal';

const bootstrap = async ({ services: { getPoolId, getClientId, getBaseEndpointUrl } }) => {
  const resource = new Resource(
    {
      cognito: {
        poolId: getPoolId(),
        clientId: getClientId(),
      },
      baseEndpointUrl: getBaseEndpointUrl(),
    },
    '/',
  );

  resource.link('list', '/pies');
  resource.link('add', '/pies');
  resource.link('view', { href: '/pies/{id}', templated: true });

  return ok(resource);
};

export default createHandler(bootstrap);
The handler uses the newly added dependency to build up a HAL compliant resource which is returned to the client.
The supplied services are then used to correctly set the resource values based on the current setup.
We finally return a newly created ok response, which needs to be added to src/helpers/http.js.
// @flow

import type { HALResource, Response } from '../types';

export const ok = (resource: HALResource): Response => ({
  statusCode: 200,
  headers: {
    'Access-Control-Allow-Origin': '*',
    'Access-Control-Allow-Credentials': '*',
    'Content-Type': 'application/hal+json',
  },
  body: JSON.stringify(resource.toJSON()),
});
The helper function requires that a HALResource be supplied, along with a Response returned.
We shall define the structure of what a HALResource looks like within src/types/index.js.
export type HALResource = {
  _links: { [string]: any },
  toJSON: () => {},
};
Within our domain, a HALResource must provide a set of _links and a toJSON method, which converts the internal representation into JSON which can be consumed by the client.
We can now move on to covering this new handler with sufficient test coverage.
We will create a new test within src/__tests__/bootstrap.js, and ensure that the handler responds with the expected output, based on the supplied service definitions.
import handler from '../handlers/bootstrap';

it('displays the bootstrap details', async () => {
  const services = {
    getPoolId: () => 'POOL_ID',
    getClientId: () => 'CLIENT_ID',
    getBaseEndpointUrl: () => 'BASE_ENDPOINT_URL',
  };

  const response = parseResponse(await handler(services)({}, {}));

  expect(response.statusCode).toBe(200);
  expect(response.body.cognito.poolId).toBe('POOL_ID');
  expect(response.body.cognito.clientId).toBe('CLIENT_ID');
  expect(response.body.baseEndpointUrl).toBe('BASE_ENDPOINT_URL');
});
With this addition we can run make test locally to ensure the handler honours the agreement.
Committing these changes to the GitHub repository will in-turn invoke a new Travis CI build.
Finally, we can run make deploy to see this endpoint in action within our dev AWS stage.
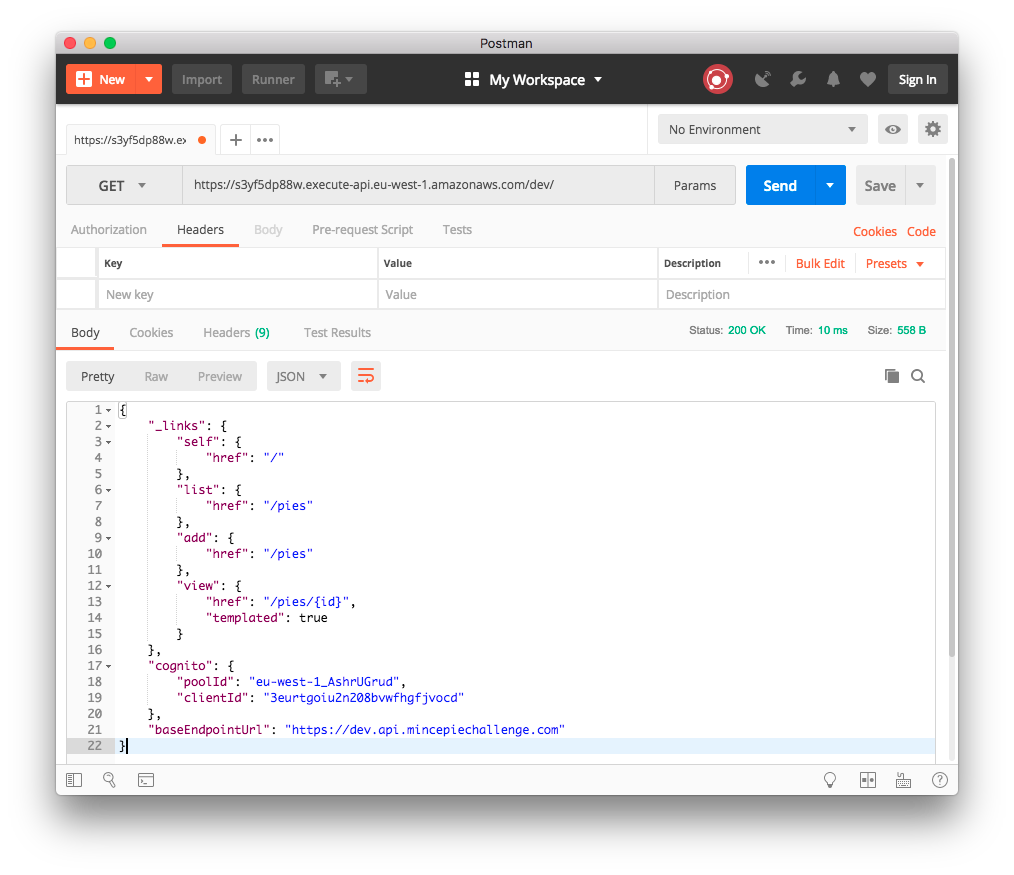
Adding Serverless Offline
We can now access this Bootstrap endpoint online within our dev AWS stage.
This is great - but wouldn’t it be even better if we could interact with this project locally!
In doing so, we would be able to quickly inspect the API’s behaviour without having to deploy the resources to AWS.
Once we are settled on the implementation, we could then deploy the changes to our online dev stage, and then subsequently prod when we wish to release it to the world.
To do this we will add Serverless Offline to our project, which locally emulates AWS Lambda and API Gateway.
Internally, it starts up a small HTTP server which handles request lifecycles like API Gateway does, invoking the desired handlers.
To start with, we shall add a new development dependency to the package.json file.
{
  "devDependencies": {
    "serverless-offline": "^3.25.6"
  }
}
We can then update the serverless.yml configuration, amending the default stage (if one is not provided within command-line invocation) to be offline.
For the sake of clarity we will also specify the default host and port the Serverless Offline HTTP server should bind itself to.
provider:
  stage: ${opt:stage, 'offline'}

custom:
  serverless-offline:
    host: 0.0.0.0
    port: 3000
As we now wish to make container requests to port 3000, we will create an additional service exposing this port within the docker-compose.yml file.
services:
  serverless-offline:
    build: .
    env_file: .env
    ports:
      - 3000:3000
    volumes:
      - .:/opt/app
      - app-modules:/opt/app/node_modules
Subsequently, as we are now defaulting to a new offline stage, we must define the required configuration within a config.offline.yml file.
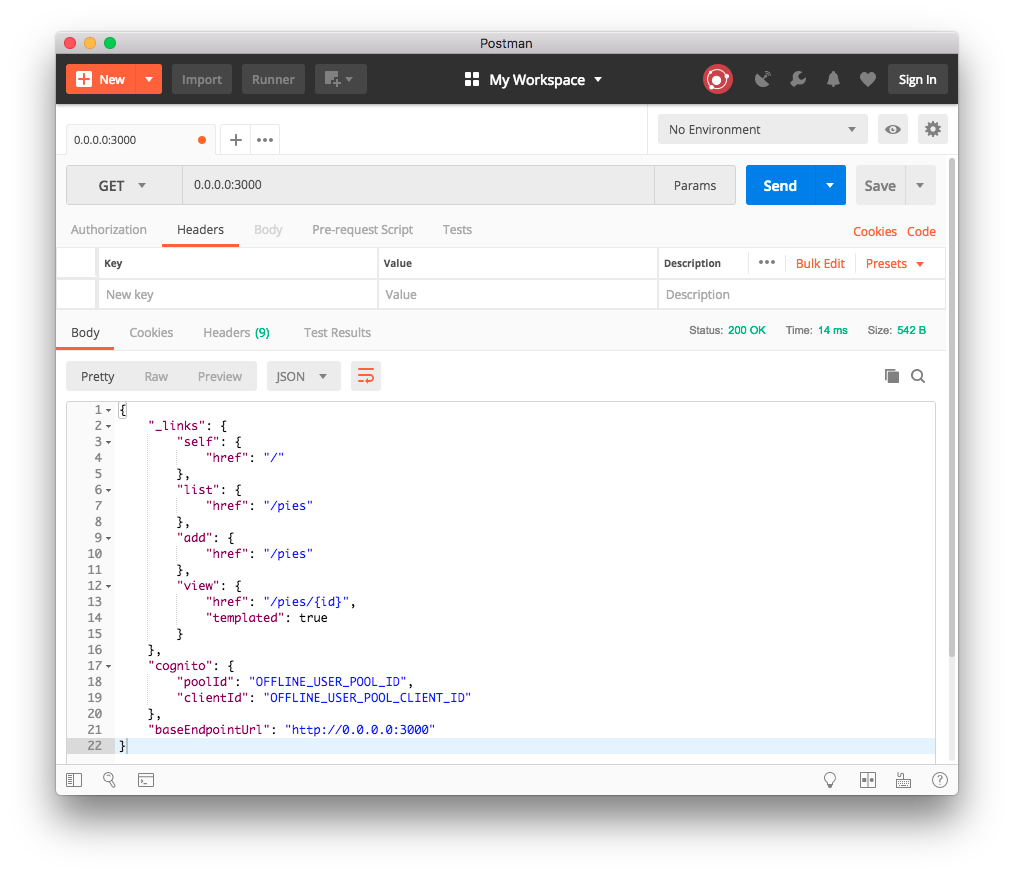
baseEndpointUrl: 'http://0.0.0.0:3000'
userPoolId: 'OFFLINE_USER_POOL_ID'
userPoolClientId: 'OFFLINE_USER_POOL_CLIENT_ID'
As we do not wish to use the online Amazon Cognito instance whilst in the offline stage, we will provide static dummy pool identifiers instead.
We can then add a new target to Makefile, to correctly open the service ports and run the offline HTTP server.
offline:
  docker-compose run --service-ports --rm serverless-offline sls offline --stage=offline
With his in place we can run make offline, you should now be able to access the offline endpoint by visiting http://0.0.0.0:3000.
Any changes that you now make to the handler implementation will be automatically represented within the offline instance, providing you with a much quicker development REPL cycle.
We have now created our first Mince Pie Challenge API endpoint, which not only works within the online dev stage, but also is equipped to handle offline access.
Join me in the next post where we will be adding the ability to add and list Mince Pies to the API, using both an online and local Amazon DynamoDB instance.