
Posted by Edd Mann on Aug 16, 2018
Mince Pie Challenge: Adding and Listing Mince Pies with Amazon DynamoDB
In the previous post we began to implement the API endpoints, starting off with creating the bootstrap response.
We did this in a manor that catered for both online and offline development access.
In this post we will incorporate the ability to add and list mince pies, persisting the state within Amazon DynamoDB.
Following this, we will enrich our offline development process by setting up a Amazon DynamoDB Local instance using Docker.
Adding Pies with Amazon DynamoDB
If we again look back at the API RAML definition, we can see that we wish to provide the client with the ability to add a new mince pie to the challenge by making a POST request with the specific pie name.
If successful, the new pie resource will be returned back to the client.
To persist the pie resources and associated ratings we shall be using the fully-managed NoSQL Amazon DynamoDB solution.
A deep-dive into the specifics of DynamoDB is outside the scope of this series, but I would urge you to checkout these great resources on the subject.
We shall start off by defining the desired table within resources.yml, and grant access to the table for each of the present Lambda functions within roles.yml.
Resources:
  PieTable:
    Type: AWS::DynamoDB::Table
    Properties:
      TableName: ${file(./config.${self:provider.stage}.yml):tableName}
      AttributeDefinitions:
        - AttributeName: Id
          AttributeType: S
      KeySchema:
        - AttributeName: Id
          KeyType: HASH
      ProvisionedThroughput:
        ReadCapacityUnits: 1
        WriteCapacityUnits: 1

Outputs:
  PieTableName:
    Value:
      Ref: PieTable
- Effect: Allow
  Action:
    - dynamodb:*
  Resource: 'arn:aws:dynamodb:${self:provider.region}:*:table/${file(./config.${self:provider.stage}.yml):tableName}'
This table includes a unique Id attribute which will be used as the record key.
At this time we have statically specified some rather low throughput units, when we enter production these should be tuned accordingly.
We assign each Lambda function a role that grants access to perform all available actions on this table, this could be restricted in the future for security concerns.
In a similar manor to how we have defined stage specific parameters in the past, we shall specify the desired table name per config.{stage}.yml file like so.
tableName: 'dev-mince-pie-challenge'
With the table now present we can move on to providing the ability to add new mince pies to the challenge.
Each pie is uniquely distinguishable based on an associated UUID, to generate these identifiers we must include a new runtime dependency within package.json.
{
  "dependencies": {
    "uuid": "^3.3.2"
  }
}
With this dependency available, we will now create a new service within src/services/dynamoDBPieStore.js which will be tasked with managing interaction between the handler and persistent state.
// @flow

import type { Pie, UserId } from '../types';

import uuid from 'uuid/v4';
import AWS from 'aws-sdk';

export const addPie = (tableName: string) => (userId: UserId, name: string): Promise<Pie> => {
  const pie = {
    Id: uuid(),
    UserId: userId,
    Name: name,
    AvgRating: 0,
    PhotoUrl: undefined,
    ThumbnailUrl: undefined,
    Ratings: {},
    AddedAt: new Date().getTime(),
  };

  return new AWS.DynamoDB.DocumentClient()
    .put({ TableName: tableName, Item: pie })
    .promise()
    .then(() => pie);
};
At this time we simply expose an addPie function which allows us to partially apply it with the desired stages table name.
Once invoked, we build up the initial pie structure, persist it to the DynamoDB table and finally return it to the caller.
This pie structure is typed by Flow, and as such needs to be added to src/types/index.js.
export type UserId = string;

type URL = string;

type UUID = string;

export type Pie = {
  Id: UUID,
  UserId: UserId,
  Name: string,
  AvgRating: number,
  PhotoUrl: ?URL,
  ThumbnailUrl: ?URL,
  Ratings: { [UserId]: number },
  AddedAt: number,
};
Now we have the ability to persist new pies, we can move on to creating the internal handler (src/handlers/add.js) which will encapsulate this functionality.
// @flow

import { badRequest, created, json } from '../helpers/http';
import { createHandler, withStrictHttpAuthentication } from '../helpers/handlers';
import { Resource } from 'hal';

const add = async ({ event, userId, services: { addPie } }) => {
  const { name } = json(event.body);

  if (!name) {
    return badRequest('Invalid request body', [{ name: 'name', reason: "You must supply the pie's name." }]);
  }

  const pie = await addPie(userId, name);

  const resource = new Resource(
    {
      id: pie.Id,
      name: pie.Name,
      rating: { avg: 0, total: 0 },
      addedAt: new Date(pie.AddedAt).toISOString(),
    },
    `/pies/${pie.Id}`,
  );

  resource.link('photo', `/pies/${pie.Id}/photo`);

  return created(resource);
};

export default createHandler(withStrictHttpAuthentication(add));
This handler simply ensures that a name has been supplied within the requests JSON body, and then proceeds to add it to the challenge.
We ensure that only authenticated clients have access to this behaviour (by-way of withStrictHttpAuthentication) and return a newly specified created response.
As we are expanding our HTTP language we need to add these functions to src/helpers/http.js.
export const created = (resource: HALResource): Response => ({
  statusCode: 201,
  headers: {
    'Access-Control-Allow-Origin': '*',
    'Access-Control-Allow-Credentials': '*',
    'Content-Type': 'application/hal+json',
    Location: resource._links.self.href,
  },
  body: JSON.stringify(resource.toJSON()),
});

export const badRequest = (detail: string, errors: Array<{ name: string, reason: string }>): Response => ({
  statusCode: 400,
  headers: {
    'Access-Control-Allow-Origin': '*',
    'Access-Control-Allow-Credentials': '*',
    'Content-Type': 'application/problem+json',
  },
  body: JSON.stringify({ title: 'Bad Request', detail, errors }),
});

export const json = (input: ?string): { [string]: any } => {
  try {
    return input ? JSON.parse(input) : {};
  } catch (e) {
    return {};
  }
};
This internal handler is called from the parent src/add.js handler, which provides us with the concrete user authentication and pie addition services.
// @flow

import add from './handlers/add';
import { addPie } from './services/dynamoDBPieStore';
import createUserTokenAuthenticator from './services/userTokenAuthenticator';

const { TABLE_NAME, USER_POOL_ID } = process.env;

if (!TABLE_NAME) {
  throw new Error('TABLE_NAME is not present');
}

if (!USER_POOL_ID) {
  throw new Error('USER_POOL_ID is not present');
}

export const handler = add({
  getUserIdFromToken: createUserTokenAuthenticator(USER_POOL_ID),
  addPie: addPie(TABLE_NAME),
});
With the implementation in-place, we can then wire up the handler within functions.yml.
add-pie:
  handler: src/add.handler
  events:
    - http:
        path: /pies
        method: post
        cors: true
As we define the table name ‘per stage’ and access to this resource is common, we shall include the table name within the serverless.yml global environment configuration.
provider:
  environment:
    TABLE_NAME: ${file(./config.${self:provider.stage}.yml):tableName}
Like the previous bootstrap endpoint, we shall add some suitable test coverage within src/__tests__/add.js, which will verify the intended behaviour of the service.
import handler from '../handlers/add';

it('requires an authenticated user', async () => {
  const services = { getUserIdFromToken: () => Promise.resolve() };

  const response = parseResponse(await handler(services)({ headers: { Authorization: '' } }, {}));

  expect(response.statusCode).toEqual(401);
});

it('requires a pie name', async () => {
  const services = { getUserIdFromToken: () => Promise.resolve('USER_ID') };

  const response = parseResponse(await handler(services)({ headers: { Authorization: 'TOKEN' } }, {}));

  expect(response.statusCode).toEqual(400);
});

it('adds a new mince pie', async () => {
  const services = {
    getUserIdFromToken: () => Promise.resolve('USER_ID'),
    addPie: jest.fn((userId, name) => ({ Id: '123456', Name: name, UserId: userId, AddedAt: 12345678 })),
  };
  const body = JSON.stringify({ name: 'Mince Pie' });

  const response = parseResponse(await handler(services)({ headers: { Authorization: 'TOKEN' }, body }, {}));

  expect(response.statusCode).toEqual(201);
  expect(services.addPie).toHaveBeenCalledWith('USER_ID', 'Mince Pie');
});
As discussed in a previous post, we have intentionally split the domain logic out from the external dependencies.
This allows us to easily incorporate test doubles within our tests, allowing us to inspect that the addPie service function is being invoked as expected.
If we now make deploy we shall see a new endpoint appear within the deployment summary.
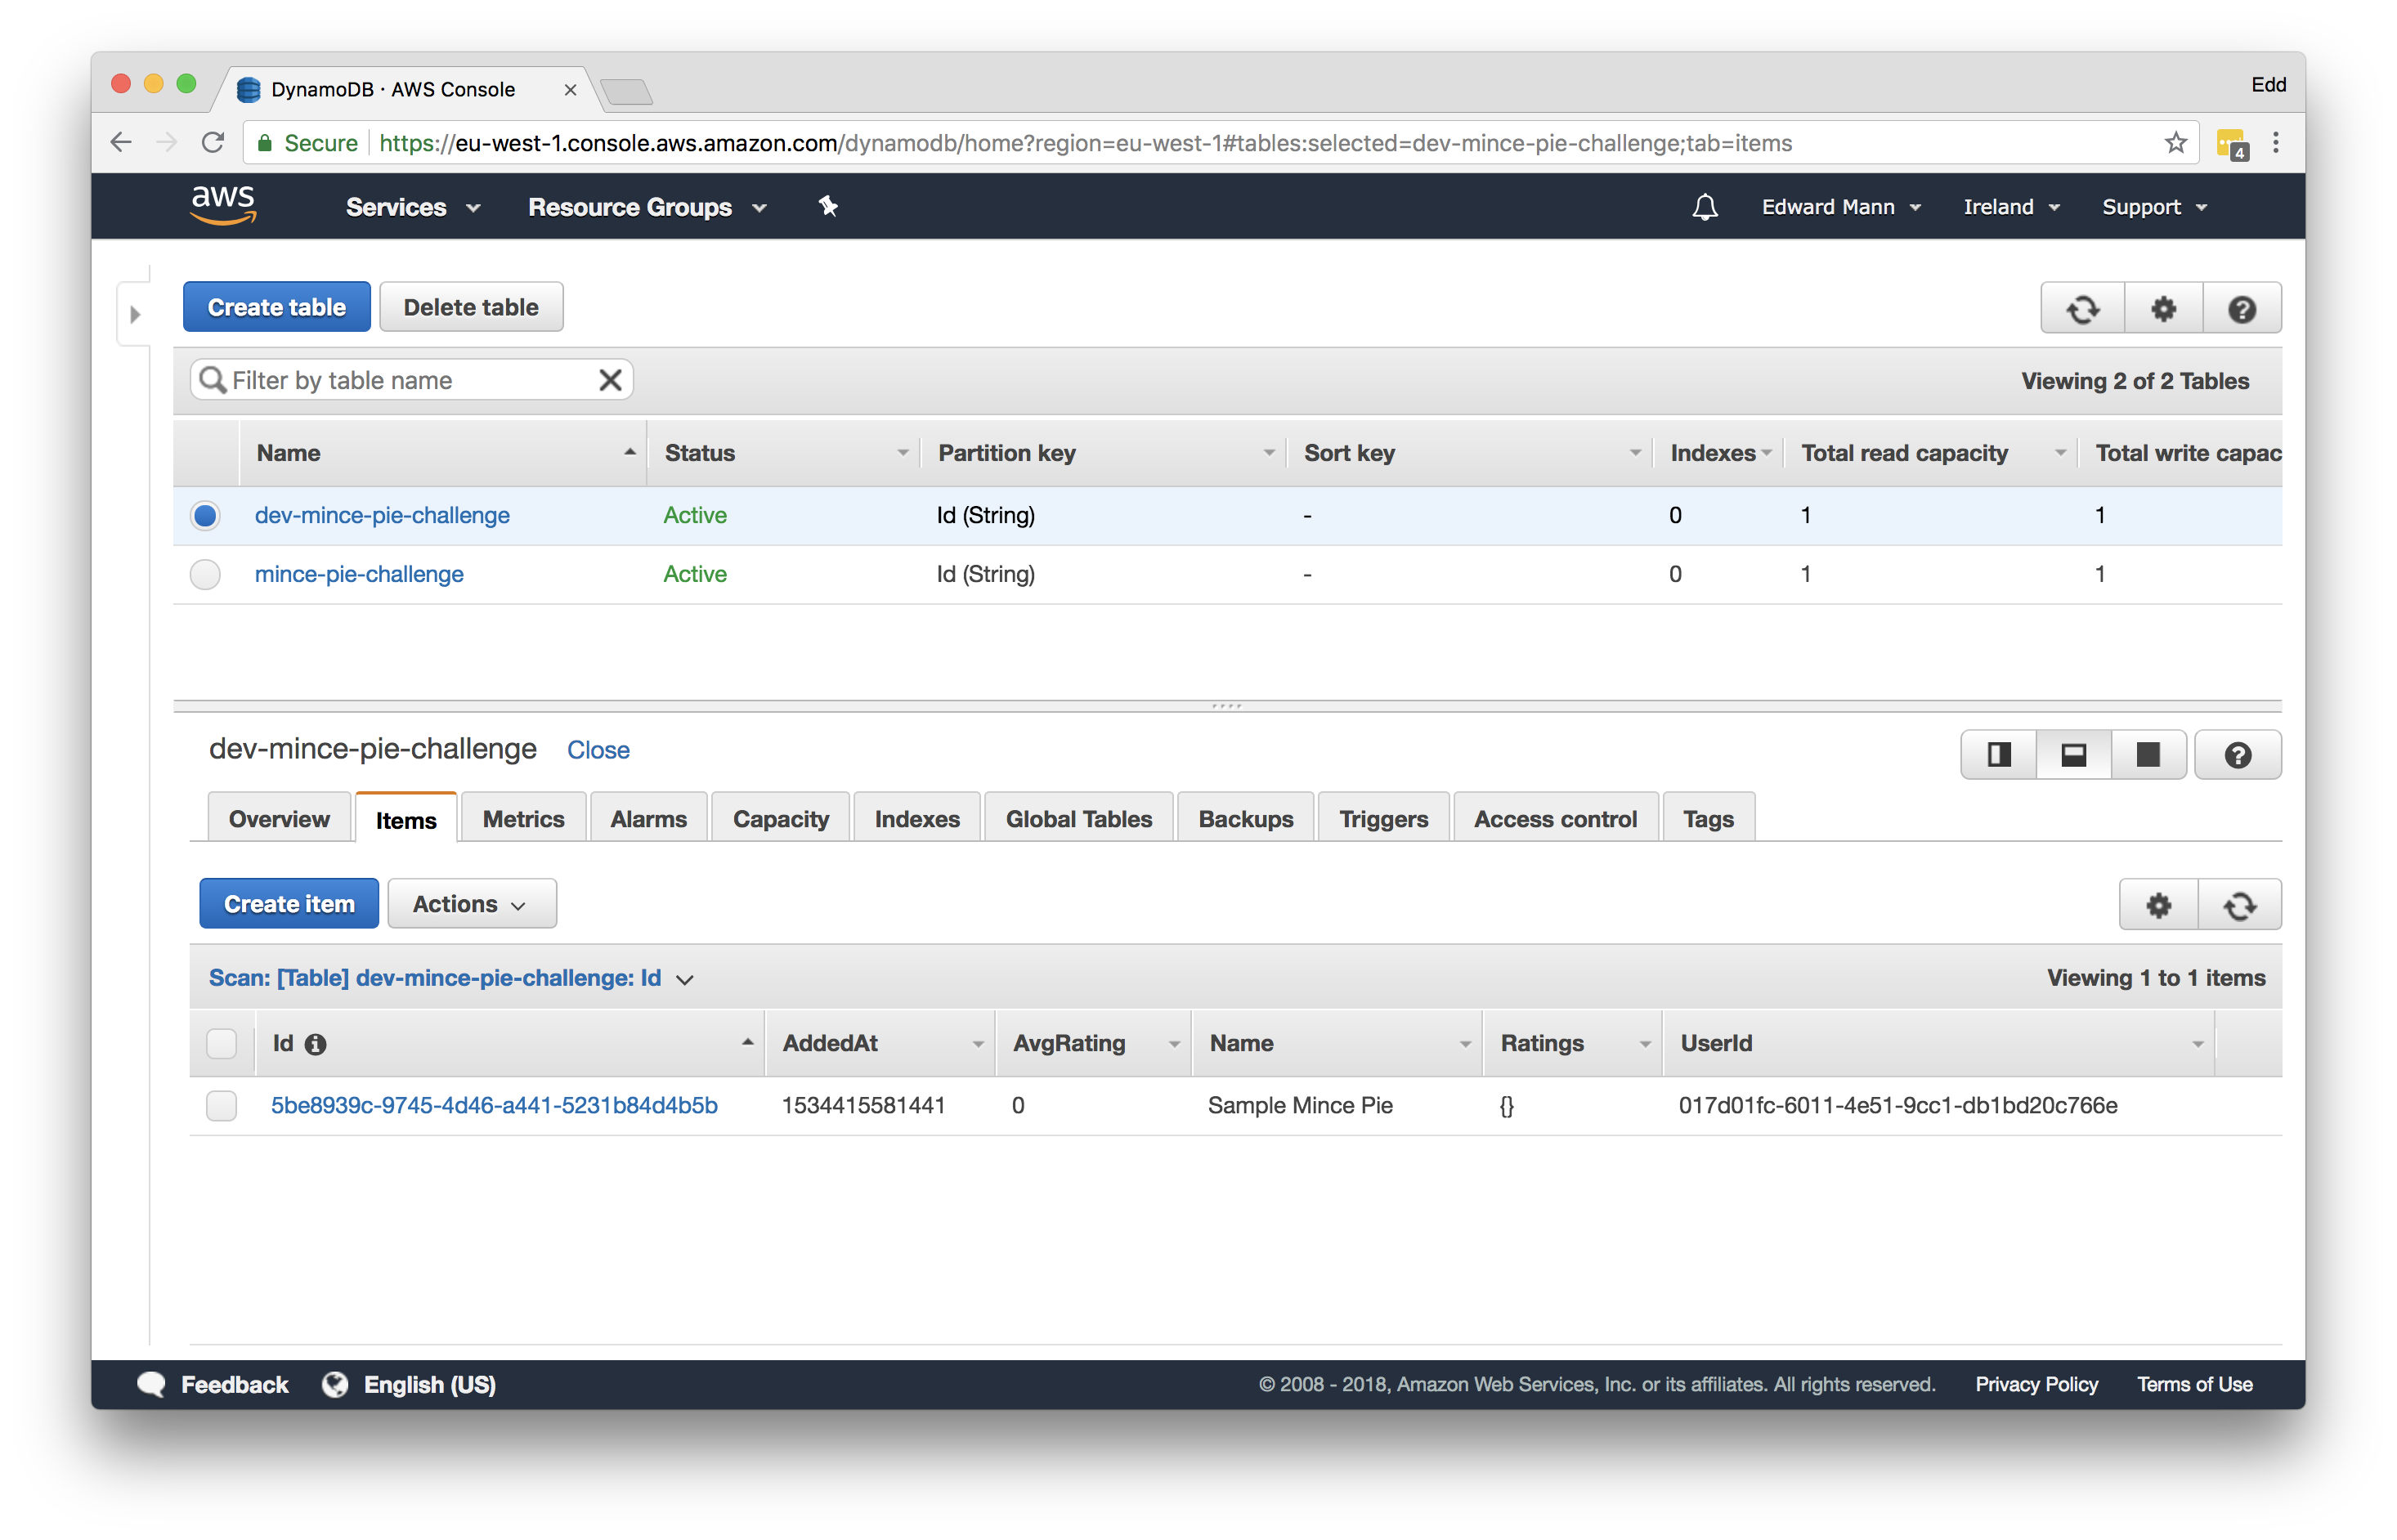
We can now POST to this endpoint as described within the RAML documentation, and see that the expected responses are returned.
However, without going into the AWS console and viewing the table records, the client is unable to actually see any of the pies they have added.
We will address this in the next section.
Listing Pies with Amazon DynamoDB
Now we have the ability to add new pies, we will move on to granting the client access to list all pies present within the challenge.
We will start off by adding a new function to src/services/dynamoDBPieStore.js, which will return all the pies present.
export const allPies = (tableName: string) => (): Promise<Array<Pie>> =>
  new AWS.DynamoDB.DocumentClient()
    .scan({ TableName: tableName })
    .promise()
    .then(r => r.Items);
From here we can implement the internal handler within src/handler/list.js, which will be used to generate the collection resource response.
// @flow

import { createHandler } from '../helpers/handlers';
import { ok } from '../helpers/http';
import { Resource } from 'hal';

const list = async ({ services: { allPies } }) => {
  const pies = (await allPies()).map(
    pie =>
      new Resource(
        {
          id: pie.Id,
          name: pie.Name,
          thumbnail: pie.ThumbnailUrl,
          rating: { avg: pie.AvgRating, total: Object.keys(pie.Ratings).length },
        },
        `/pies/${pie.Id}`,
      ),
  );

  const resource = new Resource({ total: pies.length }, '/pies');

  resource.embed('pies', pies);

  return ok(resource);
};

export default createHandler(list);
As described within the RAML definition, important details about each pie are embedded within the listing collection resource.
This stops us from having to make many individual HTTP requests per pie.
We can then encapsulate this in the concrete handler within src/list.js, which configures the external database service dependency.
// @flow

import list from './handlers/list';
import { allPies } from './services/dynamoDBPieStore';

const { TABLE_NAME } = process.env;

if (!TABLE_NAME) {
  throw new Error('TABLE_NAME is not present');
}

export const handler = list({
  allPies: allPies(TABLE_NAME),
});
We can now assert that the handler provides the desired results by covering the behaviour with tests within src/__tests__/list.js.
import handler from '../handlers/list';

it('lists mince pies', async () => {
  const pies = [
    {
      Id: '1',
      UserId: 'USER_ID',
      Name: 'Mince Pie',
      AvgRating: 0,
      PhotoUrl: undefined,
      ThumbnailUrl: undefined,
      Ratings: {},
      AddedAt: 123456789,
    },
    {
      Id: '2',
      UserId: 'USER_ID',
      Name: 'Another Mince Pie',
      AvgRating: 0,
      PhotoUrl: undefined,
      ThumbnailUrl: undefined,
      Ratings: {},
      AddedAt: 123456789,
    },
  ];

  const services = {
    allPies: () => Promise.resolve(pies),
  };

  const response = parseResponse(await handler(services)({}, {}));

  expect(response.statusCode).toEqual(200);
  expect(response.body.total).toBe(2);
  expect(response.body._embedded.pies).toHaveLength(2);
});
Finally, we can define the list handler within functions.yml, and perform another make deploy.
list-pies:
  handler: src/list.handler
  events:
    - http:
        path: /pies
        method: get
        cors: true
If we now visit this new endpoint we should see the pie we added from the last request. We have now added the ability to add and list mince pies within the challenge using online AWS resources. In similar fashion to how we were able to develop the bootstrap endpoint offline, we will now expand upon this and add the ability to interact with these endpoints using Amazon DynamoDB Local.
Using Amazon DynamoDB Local for Offline Development
We shall be using a dedicated Docker container which will expose the DynamoDB Local instance to our API.
To begin, we need to add the new service to the docker-compose.yml file, ensuring that the serverless-offline service is linked and made aware of it.
services:
  serverless-offline:
    links:
      - dynamodb
  dynamodb:
    image: ccabreraruiz/dynamodb-local
    ports:
      - 8000:8000
The Serverless Framework is able to interact with this DynamoDB Local instance by adding an additional plugin.
We shall add this development dependency to the package.json file.
{
  devDependencies: {
     "serverless-dynamodb-local": "^0.2.30",
  }
}
With this now available, we can define how the plugin can access the local instance within the serverless.yml file.
custom:
  dynamodb:
    start:
      host: dynamodb
      port: 8000

plugins:
  - serverless-dynamodb-local
This plugin can be used for both provisioning and managing a DynamoDB Local instance.
As we are using Docker to provision the instance we only require the plugin to ensure that the specific resources presented in resources.yml are made available.
To do this we shall update the Makefile offline target to ensure that a freshly migrated DynamoDB table is present when we wish to develop offline.
offline:
  docker-compose rm -sf dynamodb && \
  docker-compose run --rm serverless-offline sls dynamodb migrate --stage=offline && \
  docker-compose run --service-ports --rm serverless-offline sls offline --stage=offline
The next step is to decide how we will provide offline counterparts to the online Amazon Cognito and Amazon DynamoDB we will be using in online stages.
To do this we will take advantage of Webpack’s alias resolution and a flag that is set when Serverless is building the offline instance.
We shall update webpack.config.js as follows.
const IS_OFFLINE = slsw.lib.webpack.isLocal;

module.exports = {
  resolve: {
    alias: {
      db: path.resolve(__dirname, `./src/services/${IS_OFFLINE ? 'localDynamoDBPieStore' : 'dynamoDBPieStore'}`),
      userTokenAuthenticator: path.resolve(
        __dirname,
        `src/services/${IS_OFFLINE ? 'inMemoryUserTokenAuthenticator' : 'cognitoUserTokenAuthenticator'}`,
      ),
    },
  },
};
By adding this layer of indirection we provide the ability to swap out the desired db and userTokenAuthenticator service, based on if we are in online or offline mode.
To maintain the current online functionality all we need to do is replace the paths defined within src/list.js and src/add.js with these new aliases.
import { addPie, allPies } from 'db';
import createUserTokenAuthenticator from 'userTokenAuthenticator';
Now we can define the specific implementations of the service which will be used in offline mode.
In the case of db which will interact with the local instance, we can define it as so within src/services/localDynamoDBPieStore.js.
// @flow

import type { Pie, UserId } from '../types';

import uuid from 'uuid/v4';
import AWS from 'aws-sdk';

const config = { region: 'localhost', endpoint: 'http://dynamodb:8000' };

export const addPie = (tableName: string) => (userId: UserId, name: string): Promise<Pie> => {
  const pie = {
    Id: uuid(),
    UserId: userId,
    Name: name,
    AvgRating: 0,
    PhotoUrl: undefined,
    ThumbnailUrl: undefined,
    Ratings: {},
    AddedAt: new Date().getTime(),
  };

  return new AWS.DynamoDB.DocumentClient(config)
    .put({ TableName: tableName, Item: pie })
    .promise()
    .then(() => pie);
};

export const allPies = (tableName: string) => (): Promise<Array<Pie>> =>
  new AWS.DynamoDB.DocumentClient(config)
    .scan({ TableName: tableName })
    .promise()
    .then(r => r.Items);
You can see in this case we are required to provide the specific local endpoint that the DocumentClient should interact with.
In the case of the userTokenAuthenticator, there is sadly no local equivalent to Amazon Cognito.
We shall instead use a simple in-memory representation (src/services/inMemoryUserTokenAuthenticator.js), which will provide a couple of stub user tokens for us to use.
// @flow

import type { UserTokenAuthenticator } from '../types';

const users = {
  TOKEN1: 'User1',
  TOKEN2: 'User2',
  TOKEN3: 'User3',
};

export default (poolId: string): UserTokenAuthenticator => async token => users[token];
With these changes, we are required to define what the new aliases point to in regards to Flow.
We shall use the online services in this case, adding them to the .flowconfig file like so.
[options]
module.name_mapper='^db$' -> '<PROJECT_ROOT>/src/services/dynamoDBPieStore'
module.name_mapper='^userTokenAuthenticator$' -> '<PROJECT_ROOT>/src/services/cognitoUserTokenAuthenticator'
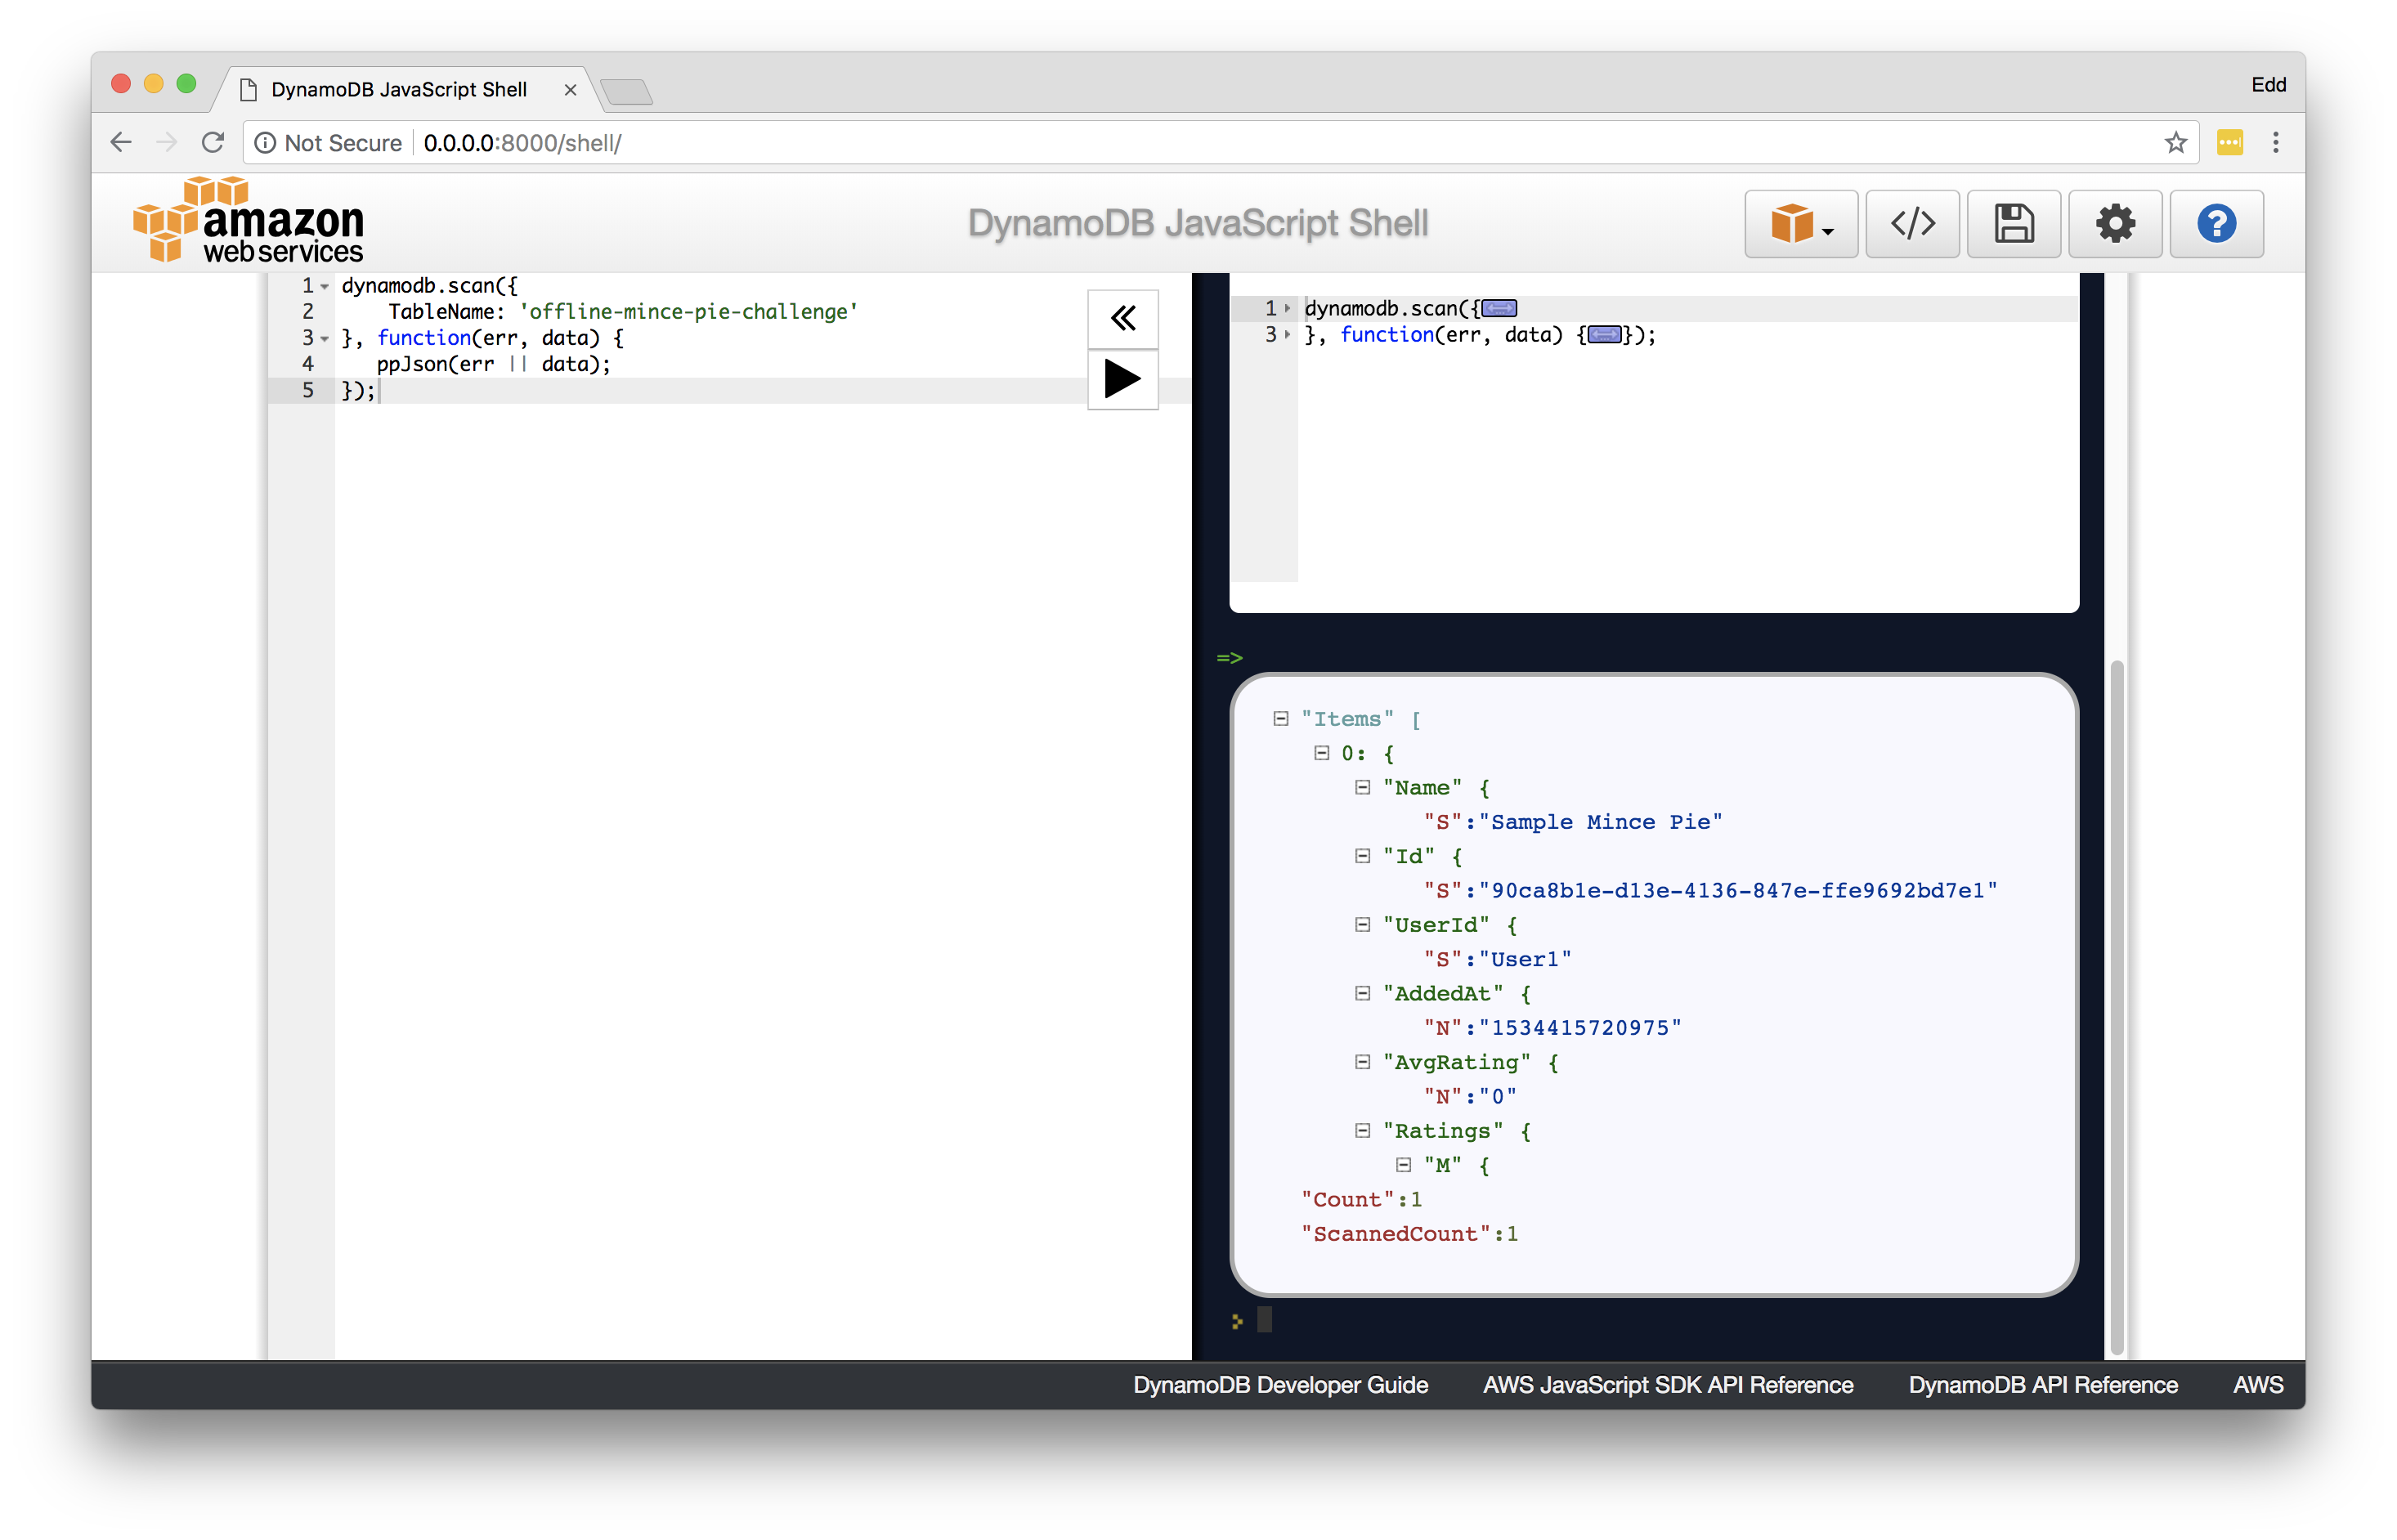
Finally, we can make offline and experiment with the new API endpoints offline.
We can supply authenticated user tokens (i.e TOKEN1) in the event that we wish to add a new pie to the challenge.
In the case of the local DynamoDB instance, we are able to inspect the current state and run custom queries by visiting http://0.0.0.0:8000/shell/.
I hope you have enjoyed exploring working with DynamoDB using Lambda, and adding the ability to develop the service in an offline manor. In the next post we shall be expanding the API further, by adding the capability to view and remove specified mince pies.